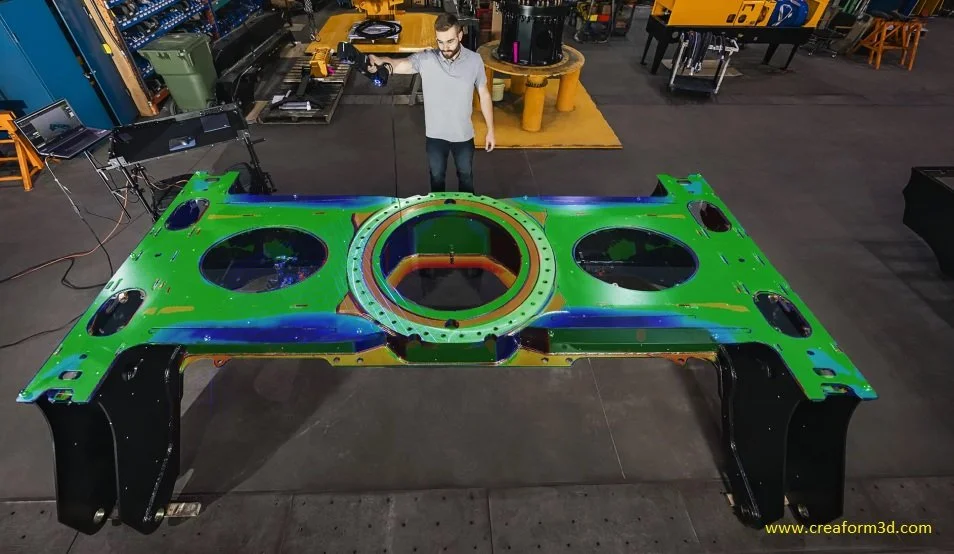
The Shift from Quality Control to Quality Assurance with 3D Scanning
The challenge of maintaining rigorous quality standards while optimizing production efficiency is a perpetual balancing act. Yet, the reliance on traditional end-of-process inspections poses significant challenges, including increased costs, production bottlenecks, and customer dissatisfaction.
This article explores a novel solution: integrating advanced 3D laser scanning technology into quality assurance frameworks. By leveraging the unparalleled accuracy and efficiency of 3D laser scanning we suggest a solution that can detect deviations early, mitigate risks, enhance product quality, and streamline production workflows.
Traditional Quality Control has focused on the following :
Reactive approach: Focuses on detecting defects in the final stages of production.
Limited scope: Only assesses the finished product, not the entire process.
Potential for rework: Defects identified late lead to delays and additional costs associated with fixing them.
Reliance on human inspection: Prone to subjectivity and inconsistencies leading to potential errors with traditional tools such as callipers and verniers.
Quality Assurance with 3D Scanning:
Proactive approach: Focuses on preventing defects by ensuring quality throughout the manufacturing process.
Holistic view: Examines both the product and the process to identify potential issues early.
Reduces rework: Early detection of issues minimizes the need for rework and associated costs.
Data-driven decisions: Provides objective and quantifiable data for making informed decisions about the process.
5 Benefits of 3D Scanning for Quality Assurance in Heavy Engineering:
High-precision measurements: 3D scanning provides metrology-grade accuracy, allowing for detailed analysis of complex shapes and dimensions. This enables engineers to identify potential issues with fit and functionality very early in the process, before they become costly problems.
Automated inspection: 3D scanning software allows for automated analysis of the scanned data. This reduces the reliance on manual inspection, eliminating human error and improving the consistency and efficiency of quality checks.
Early detection of deviations: 3D scans can identify even minor deviations from the intended design, allowing for immediate corrective action. This prevents the production of faulty parts and reduces the need for rework later in the process.
Digital recordkeeping: 3D scans create a digital record of the product, enabling comparisons throughout the manufacturing process. This facilitates continuous improvement by identifying areas for optimization and ensuring consistent quality in future production runs.
Improved communication and collaboration: 3D scan data can be easily shared with designers, engineers, and other stakeholders, enabling better communication and collaboration throughout the manufacturing process. This promotes a proactive approach to quality assurance and ensures that everyone is working towards achieving the desired outcome.
using 3D laser scanning technology into quality assurance

